Showing posts with label easy vegetarian recipe. Show all posts

Monday, June 18, 2012

J's first father's day.

Baby isn't here yet, but we are only days away from our due date/guess date.  (Less than a week, I can't believe it.)  This point of pregnancy is really eerie to think about because I have a babe inside of me that would live and thrive out in the real world now.  It's very much like being sandwiched between two worlds at the moment.
Since Jason has been so supportive and caring throughout my whole pregnancy, I wanted to do something especially nice for him for Father's Day.   In the afternoon we went to see Moonrise Kingdom, but before our day officially began, I surprised him with breakfast.

Nutella and banana crepes, that is.  They were a big hit, and I was even able to sit while I made them.  (Heavenly.)


**The crepes themselves look a bit darker than they normally would because I used whole wheat flour.**

Friday, June 8, 2012

Pierogies

Jason and I have been hard at work making freezer meals for after the baby has arrived.  We're making lots of lasagna and quiche, and today I made a Polish specialty that's very popular in North-East Pennsylvania;  Pierogies!  I've never made Pierogies from scratch before, but after seeing a recipe I thought, how hard could it possibly be?  It was very easy, but fairly time consuming.  The ooey-gooey European dumplings of joy will be well worth the work now though.  Don't I know it.

I used the recipe from momofukufor2, and it worked perfectly.  After making the dough and the potato and green onion filling, I formed the pierogies and put them right into a freezer bag.  Once I'm ready to make the pierogies for dinner, all I will have to do is quickly boil them until they float and bake them with some onion and olive oil.  Yum!

** This recipe could easily be made vegan if you don't use egg in the dough or add cheese to the filling.   Also, I added two minced cloves of garlic in the potato filling, making it ultra delectable, FYI.


Monday, March 5, 2012

I now pronounce you Smoothie and Popsicle.

Next to barbeque sauce on everything, the only other thing I have been craving has been sweets.  The way I have been getting around eating ice cream every single moment of the day has been popsicles.  Tart popsicles, sweet popsicles, I don't care.  Let me tell you, it does the trick, and I end up getting a good serving of fruit in the process.  Can't go wrong.
Jason has been really into smoothies lately, so we have been combining our current favorite treats to make a sweet treat wonderland.

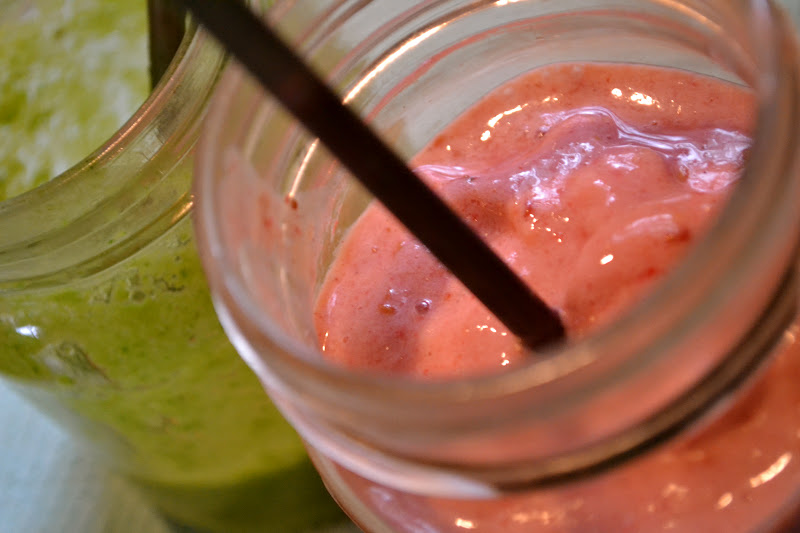
Pink Peach Mango Smoothie


Ingredients
  • 1/3 cup Orange juice
  • 1/3 cup Whole milk (feel free to use any kind of milk you want, I have to drink whole milk, so I sneak it in where I can.)
  • Frozen strawberries
  • Frozen raspberries
  • Frozen mango
  • Frozen peaches

Directions
  1. Throw an individual handfull of frozen strawberries, raspberries, mango, and peaches into the blender.
  2. Add orange juice and whole milk.  Securely top blender and proceed to blend.  If you want your smoothie to be more thick, add more fruit.  If you would like your smoothie to be more liquidy, add more orange juice and milk.


Pink Peach Mango Popsicle


  1. Make Pink Peach Mango Smoothie, then pour smoothie mixture into a Popsicle mold  (I got my set from a thrift store for 90 cents!)  You can also use paper cups with popsicle sticks if you do not have a popsicle mold.
  2. Let freeze over night.
  3. Run mold under warm water until you can remove the popsicle with ease.  Enjoy!


Sunday, August 22, 2010

Skinny Eggplant Parmesan

Okay.  Enough with the hair for a day. 


Skinny Eggplant Parmesan.
I love making this recipe.  Eggplant was my family's ultimate comfort food when I was a girl.  It sang our heritage, our ups and downs.  It was always the center of the first meal my mother always prepared for me when I came home from college or from touring that let me know that I was actually home.  My mom still makes it the first night I come home to Pennsylvania whenever I visit.
Now.  Usually Eggplant Parmesan is a pretty fattening dish, but it doesn't have to be.  What makes my Eggplant Parmesan different from the rest is that I do not fry my breaded eggplant.  I bake it.
I also use fresh mozzarella, and not the packaged kind that is full of extra sodium.
It ends up:
  1. Tasting better.
  2. Leaving you with a full belly that isn't full of heavy oil.

Ingredients:
  • 1 Medium-Large Eggplant
  • breadcrumbs
  • 2 eggs
  • 2 Tbl. Milk, or any milk substitute would do just fine
  • Fresh mozzarella 
  • Fresh marinara sauce (handmade or local is always better tasting, and better for you...no weird ingredients.)
  • Olive Oil
Supplies:
  • 2 baking sheets
  • Frying pan, or whatever you really have that will heat it up

Directions:
  1. Pre-heat the oven to 350*F.
  2. Peel the Eggplant (you can leave the skin on, but it is bitter, tough, and has a noticeably different texture that I don't like.) then slice it into about 1/4 inch coins.
  3. Beat Eggs and about 2 tbl. milk together.  Dip the eggplant coins into the Eggs/milk, and then cover them in breadcrumbs.
  4. Lightly brush the baking sheet with olive oil, and proceed to lay the eggplant onto the sheets.
  5. Bake for 10 minutues, turn the eggplant coins over and proceed to bake for another 10 mins, and remove the baking sheet once the eggplant is soft (or until a fork will slip out of the eggplant easily.)
  6. Heat the frying pan, and add 1/2 cup marinara sauce to the bottom of the pan.  Proceed to lay the eggplant in the frying pan one at a time.  Follow the pattern:  Eggplant, marinara sauce, mozzarella.  Repeat.
  7. Cook until everything is warm, melty, and delicious.
 

Tuesday, March 30, 2010

Poor Man's Hummus Recipe

Poor Man's Hummus...now, you might ask, why does it have such a name?
Well. I will tell you. I substitute the tahini with cumin!!
And let me also tell you, I don't really miss it.
You also make twice the amount that you would normally buy, only for a fraction of the price!
Great for entertaining on a budget.
Count me in!

Poor Man's Hummus Recipe

Ingredients:
  • 1 can Chickpeas/garbonzo beans (whatever you call them works for me.)
  • 3 to 4 cloves garlic
  • 1 tsp cumin
  • pinch of salt
  • pinch of pepper
  • about a cup of water, give or take
  • **I also put in a bit of mixed herb goat cheese this time around because I had it in the fridge, but I normally wouldn't add this.
Additional Supplies:
  • Blender
  • A teasoon.
Directions:
  1. Drain one can of ready to serve chickpeas/garbonzo beans. Put them into your blender.
  2. Plop 3 to 4 peeled and diced cloves of garlic into the blender, along with cumin, slat, pepper, and enough water for it to blend up. Usually around 1 cup of water, give or take, will do.
  3. Once it is blended to the consistency you prefer, top it with a dash of cumin and pepper.
  4. Done!

Thursday, September 10, 2009

Break it down now!...so I hear you like pita bread?

Okay, a little break from the blessings. Blah blah blah (I hope that's not what you're hearing, even though I know that's probably what you're hearing!)


Pita Bread Recipe!
Ingredients:
  • 3 cups flour
  • 1 package of yeast (or 2 1/2 tsp)
  • 1 tsp salt
  • 1 1/4 cup warm water
  • 1/2 tsp Italian herbs (or just one of your favorite Italian herbs would be fine too, I'm sure.)
  • 1 tsp garlic powder
  • 1/2 tsp sugar (nuh-uh, you say? yes sir/madam, I say!)
  • olive oil
How to do it, and do it well (according to Connie):
  1. Pre-heat oven to 400*F.
  2. Add yeast to 1/4 cup of warm water, wait a few minutes to let it activate.
  3. Mix dry ingredients together.
  4. Make a well in the middle to the dry mixture (basically, dig a little hole). Add 1 additional cup of warm water. Mix together, then knead and let it rise is a warm place for about an hour. (My mom always put her dough to rise on top of the steps with a towel over it.)
  5. Divide the dough into smaller balls (depending on how big you would like your pita bread to be), then roll them out with a rolling pin.
  6. Grease a baking sheet with olive oil, and place the rolled out pita dough upon it. Put a little olive oil on top of the rolled out dough to keep it moist and D-lish.
  7. Bake for 10-12 mins. This really depends on how chewy/crunchy you would like your pita bread to be.
  8. And now the best part! Eat!!

Oh hey, look what you can do with it!
Hello, dinner.yum!

Sunday, August 9, 2009

Mini Deep Dish Pizza

I love tiny food.
It's fun to think up, fun to make, and fun to eat.

Passing through Chicago (perhaps a few times too many) inspired this one.

Meet my newest tiny recipe: Mini Deep Dish Pizza!
Shut your mouth, you say? Oh no, I will not!


Pizza Dough Recipe my great grandmother would probably kill me for:
  1. 3 cups flour
  2. 2 1/2 table spoons yeast (or 1 package)
  3. 1 tsp salt
  4. 1 tsp garlic powder
  5. 1/2 crushed red pepper
  6. 1/2 chilli powder
  7. 1/4 cup warm water, to put the yeast into
  8. an additional 1 cup of water to add to the dry mixture
Directions:
  1. Add yeast to 1/4 cup warm water, allow to sit for 5 mins.
  2. While you're waiting on the yeast, mix the dry ingredients together.
  3. Make well in dry ingredients and add the 1/4 cup water with yeast added, then an additional cup of water.
  4. Knead, then let sit for at least an hour in a warm place. I always put a towel over my rising dough for added moisture.
  5. Knead again, and you're ready to rumble.


Mini Deep Dish Pizza Recipe (with pictures):
  1. Preheat oven to 400*F,
  2. Grease a large muffin tin with olive oil.
  3. Divide dough and roll out each section individually for each tiny pizza. Place each tiny pizza crust into where a muffin or cupcake would usually go within the tin.
  4. Pour your sauce of choice into each mini pizza. (Jason usually chooses pesto or alfredo sauce for pizza sauce, so he made some as his contribution to the meal!) I put about a serving spoons amount in each mini pizza.
  5. Chop up your veggies (onions, mushrooms, and spinach! YUM!!)
  6. Add healthy portions in for the toppings to fill those bad boys right up. I chose to put my veggies in first to get as much healthy food in as possible.
  7. Sprinkle cheese on top of your pizza (Again, untraditional, but I'm pushing the veggies first here!!!) I used mozzarella and feta.
  8. Bake for 15-20 mins.
  9. Remove from oven.
  10. Enjoy!

Friday, July 17, 2009

Vegan Split Pea Soup/Adventures with Asthma.


This past week has been really strange for me. I got really sick on Monday and I kept getting worse, and eventually on Wednesday Jason had to rush me to intensive care twice in the same day because my asthma was getting out of control and my inhaler wasn't helping me. I haven't had such a hard time with my asthma since I was a little girl.
Scary stuff, but I'm a-okay now! Thank goodness for whatever I was pumped full of, because let me tell you, it is terrifying to not be able to breathe!
My doctor was a friend of Jason's boss from Indie Coffee, too, isn't that ironic?


Since I haven't been able to write all week,
I thought I would share my Vegan Split Pea Soup recipe with everyone.

  • 2 cups dried split peas
  • 2 cups water (and add an additional cup every so often when you need to. You'll know.)
  • 1/2 large white onion, diced
  • 1 large carrot, cut into coins
  • 1 1/4 tspns curry
  • salt and pepper (however much you choose)
  1. Put the carrots into the pot you're going to use to get a little soft, and add in the onions until they become translucent.
  2. Add two cups of water, then the split peas. Keep on a medium heat and add water as the mixture become dry. If you've ever made split pea soup, you know it's supposed to be thick like a stew, so just try to find a thickness that works for you and your taste.
  3. Add the curry powder and some salt and pepper. This gives the warm taste that you would normally get from ham that is traditionally used in Split Pea Soup. My mom used to make Split Pea Soup for my family when my sister and I were young and we still ate meat, and I think the curry tastes best!
  4. Enjoy!


P.S. I've had a few people ask me if I've become vegan recently because of a lot of the recipes I've been posting, and I'm not, although I'm a Vegetarian. I just feel like Vegan recipes are a bit more challenging and allow for more creativity sometimes. I just wanted to set that straight.

Tuesday, March 10, 2009

Grilled Vegetable Lemon Pasta


Grilled Vegetable Lemon Pasta
  • 1/2 your average box of pasta (I used angel hair)
  • 1 bell pepper
  • 1 small onion
  • 1 tomato
  • olive oil
  • Parmesan cheese
  • 1 lemon
  • Salt, pepper, oregano, basil

  1. Julienne the bell pepper and onion, and dice the tomato.
  2. Lightly (lightly, lightly) coat a pan with olive oil and add the vegetables to grill (make sure you add the tomato last so it does not get too soggy! Yikes!) Once they are grilled toss in a dash of the salt, pepper, oregano, and basil (as much or as little as you choose.)
  3. Boil water (don't forget to put in a pinch of salt and a bit of olive oil!), throw the pasta in, then strain it when it's done.
  4. Add the vegetables to the pasta. Squeeze the juice of one lemon over the mixture, add a bit of olive oil so that it doesn't get too dry and yuckified, and about 1/4 cup Parmesan cheese (again, however much you want. It depends on what you like, really. I put even less than that.)
  5. Enjoy!

Eggplant and squash would be great with this dish as well, or really any veggie, for that matter. I just used what I had in the house, and thought that lemon would compliment it well....and it did!
Yes please!
I hope you enjoy this basic, but yummy dish.
Blog Widget by LinkWithin