Showing posts with label cooking. Show all posts

Monday, June 18, 2012

J's first father's day.

Baby isn't here yet, but we are only days away from our due date/guess date.  (Less than a week, I can't believe it.)  This point of pregnancy is really eerie to think about because I have a babe inside of me that would live and thrive out in the real world now.  It's very much like being sandwiched between two worlds at the moment.
Since Jason has been so supportive and caring throughout my whole pregnancy, I wanted to do something especially nice for him for Father's Day.   In the afternoon we went to see Moonrise Kingdom, but before our day officially began, I surprised him with breakfast.

Nutella and banana crepes, that is.  They were a big hit, and I was even able to sit while I made them.  (Heavenly.)


**The crepes themselves look a bit darker than they normally would because I used whole wheat flour.**

Friday, June 8, 2012

Pierogies

Jason and I have been hard at work making freezer meals for after the baby has arrived.  We're making lots of lasagna and quiche, and today I made a Polish specialty that's very popular in North-East Pennsylvania;  Pierogies!  I've never made Pierogies from scratch before, but after seeing a recipe I thought, how hard could it possibly be?  It was very easy, but fairly time consuming.  The ooey-gooey European dumplings of joy will be well worth the work now though.  Don't I know it.

I used the recipe from momofukufor2, and it worked perfectly.  After making the dough and the potato and green onion filling, I formed the pierogies and put them right into a freezer bag.  Once I'm ready to make the pierogies for dinner, all I will have to do is quickly boil them until they float and bake them with some onion and olive oil.  Yum!

** This recipe could easily be made vegan if you don't use egg in the dough or add cheese to the filling.   Also, I added two minced cloves of garlic in the potato filling, making it ultra delectable, FYI.


Wednesday, February 29, 2012

Favorite Baking Blogs

I love to get my bake on.  I love watching butter and sugar get all creamy and fantastical, but mostly I love eating the treats once they are done.
Like most people, the muse isn't always upon me.  Creativity comes in waves, and sometimes we could all use a little inspiration to encourage blossoms to bloom.  So I thought I would quickly share my favorite baking blogs with you, just in case you could use a little miracle grow for your creative juices today.


Witty writing, yummy treats!


Lovely cakes and recipes.  Always, always.


A wide variety of everything sweet and savory.


Thursday, February 9, 2012

TRY the DIY.

Here's a collections of some great DIY projects that I'm itching to try!  I knew you would all be pretty interested too, so I thought I would share.

1.)  I've been seeing these knitted pouf stools everywhere lately.  And they are always extremely expensive.So if you're like me, and you're asking yourself "how the heck can I get this look for less?":  look no further!
Click here for a knitted floor pouf tutorial from Norwegian Knitting Website, Pickles!
Wouldn't this pattern work great with a stretched jersey fabric instead of yarn?

2.)  DIY sprinkles!  I know, right?  Can we just talk about how many times I have gone to the grocery store to buy just plain white sprinkles and all I can find is a rainbow funfetti vomit fest?  Now I never have to worry about it again.  This tutorial makes so much sense, and I am POed that I never thought of it before.
Click here to learn how to make your own sprinkles!

3.)  Spumoni Bombe!  Think Neapolitan ice cream and Baked Alaska had a chunky Italian baby.
Click here for a step by step Spumoni Bombe recipe!

Saturday, November 27, 2010

Thanksgiving 2010

I love holidays, but Thanksgiving is extra special for me because it reminds me most of Jason.  One of my happiest memories with Jason is of us dancing in our living room last year because we had four days off together for the first time ever.  We were both over worked and exhausted, and I had pneumonia, but we were so happy that we had to dance.
I don't think Jason even remembers it, but it's one of my most treasured memories.
Thanksgiving is also the only holiday that we have already created our own family traditions.  Baking my mom's cheese cake recipe together (and complaining the whole time about how we wish we had a mixer), making a beautiful vegetarian dinner all day, and watching It's A Wonderful Life before bed.


Check out the Quorn Turk'y ;)


This Thanksgiving we had our friends Kari and Wes over, since we were all kind of misplaced.  It was very relaxed and informal, with no drunk uncles or awkward baby stories.  Yes please.


Monday, October 18, 2010

Psychedelic Cupcake Tutorial

This weekend my friend Krista and I made the most colorful cupcakes for our friend's Andrew and Alex's joint birthday party.  They were the champions of the evening (next to the company!), and will be sure to kick any funfetti cupcake's butt in the future.
By the by, I was inspired by The Dainty Squid's cupcake Tutorial!


Psychedelic Cupcake Tutorial.


Materials:
  • Light colored Cupcake Mix of your choice (I used boxed yellow cake mix because I was in a hurry, but you can use any light colored cake batter of your choice.)
  • 1 Measuring Cup
  • Food Coloring
  • Cupcake liners
  • Four bowls (or more)
  • Four spoons (or more)
  • Toothpicks
  • Cream cheese frosting (like you would want to use another kind anyway...psh.)


Instructions:
  1. Mix up the ingredients called for to make your cupcake batter.
  2. With a measuring cup, separate the batter into four bowls (or more, depending on how many colors you want to make.)
  3. Dye the batter in each bowl a different color with food coloring.  There should be a dye chart on the back of your box of dyes, but if not, this chart might help.  Also, Krista and I doubled the amount of dye if the color wasn't bright enough.
  4. Place your cupcake liners into your cupcake pan.
  5. Place a designated spoon to each batter color, and proceed to add small layers of each colored batter into the cupcake liners until the liner is halfway filled.
  6. Swirl with a toothpick (optional.)
  7. Bake.  Cool.  Frost.  Eat.

Sunday, August 22, 2010

Skinny Eggplant Parmesan

Okay.  Enough with the hair for a day. 


Skinny Eggplant Parmesan.
I love making this recipe.  Eggplant was my family's ultimate comfort food when I was a girl.  It sang our heritage, our ups and downs.  It was always the center of the first meal my mother always prepared for me when I came home from college or from touring that let me know that I was actually home.  My mom still makes it the first night I come home to Pennsylvania whenever I visit.
Now.  Usually Eggplant Parmesan is a pretty fattening dish, but it doesn't have to be.  What makes my Eggplant Parmesan different from the rest is that I do not fry my breaded eggplant.  I bake it.
I also use fresh mozzarella, and not the packaged kind that is full of extra sodium.
It ends up:
  1. Tasting better.
  2. Leaving you with a full belly that isn't full of heavy oil.

Ingredients:
  • 1 Medium-Large Eggplant
  • breadcrumbs
  • 2 eggs
  • 2 Tbl. Milk, or any milk substitute would do just fine
  • Fresh mozzarella 
  • Fresh marinara sauce (handmade or local is always better tasting, and better for you...no weird ingredients.)
  • Olive Oil
Supplies:
  • 2 baking sheets
  • Frying pan, or whatever you really have that will heat it up

Directions:
  1. Pre-heat the oven to 350*F.
  2. Peel the Eggplant (you can leave the skin on, but it is bitter, tough, and has a noticeably different texture that I don't like.) then slice it into about 1/4 inch coins.
  3. Beat Eggs and about 2 tbl. milk together.  Dip the eggplant coins into the Eggs/milk, and then cover them in breadcrumbs.
  4. Lightly brush the baking sheet with olive oil, and proceed to lay the eggplant onto the sheets.
  5. Bake for 10 minutues, turn the eggplant coins over and proceed to bake for another 10 mins, and remove the baking sheet once the eggplant is soft (or until a fork will slip out of the eggplant easily.)
  6. Heat the frying pan, and add 1/2 cup marinara sauce to the bottom of the pan.  Proceed to lay the eggplant in the frying pan one at a time.  Follow the pattern:  Eggplant, marinara sauce, mozzarella.  Repeat.
  7. Cook until everything is warm, melty, and delicious.
 

Wednesday, June 16, 2010

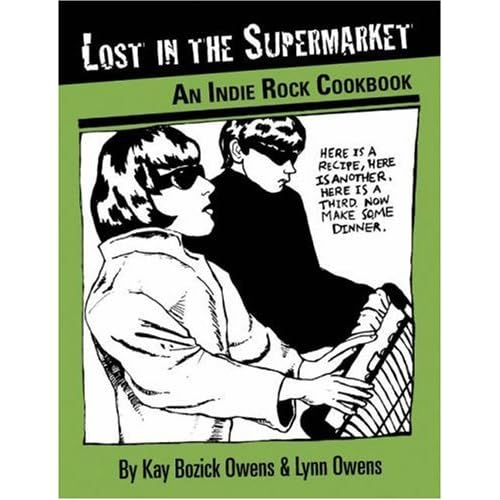
Musical Cookbooks, Edible flags, and more.

Sorry I haven't been around lately... I've been busy teaching Punk Rock Aerobics and electric guitar to 9-15 year old girls.


Anyway! I just wanted to share some cool things with everyone.


Loretta Lynn, Frank Sinatra, and yes, even Coolio.
(I know, right?!)


2.) Top 10 Songs about Coffee
And although Bob Dylan wrote one of the songs,
he isn't singing it.
(As it should be. Thank God.)


3.) Edible Flags
Guessing games can be fun...
especially when they involve food.

Wednesday, December 9, 2009

I DO NOT MESS AROUND Peanut Butter Cookies.


I like my cookies like I like my friends.
Not too sweet, and full of personality.
I usually don't like peanut butter cookies, however, I made this recipe to fit my standards.
So if you're like me and you roll your eyes at plain ol' PB Cooks because you're maybe a little bit of a cookie snob, you will most likely enjoy my twist on dull, country grandma peanut butter cookies.
Plus, the crunch of sliced almonds just does something for me.
I hope it does something for you, too.


I DO NOT MESS AROUND
Peanut Butter Cookies.

Ingredients:
  • 1/2 cup butter
  • 1/2 cup natural, creamy peanut butter
  • 1/2 cup sugar
  • 1 1/4 cup flour
  • 1/2 tsp baking powder
  • 1/2 tsp baking soda
  • 1/4 tsp Salt
  • 1 large egg
  • 1/4 cup milk (I used soy milk, but whatever you choose would be fine.)
  • 1/2 tsp vanilla
  • 1/4 cup semi-sweet chocolate chips
  • 3/4 cup M & M's (I used them because Jason and I got a free bag. You could use more chocolate chips instead.)
  • 1/4 cup sliced almonds
Directions:
  1. Preheat oven to 350*F.
  2. Mix together dry ingredients, then wet. Mix together.
  3. Let cookie dough chill for 30 mins.
  4. Bake for 15-20 mins.
  5. Fin!


P.S. Happy snow day, my fellow Mid-westerners!

Thursday, November 26, 2009

Happy Thanksgiving!

Jason and I were supposed to drive from Madison to Oklahoma for Thanksgiving to spend it with his family (it was supposed to be my first time meeting them also! Scary!!) but I got pretty sick, so we decided to take advantage of our 4 day weekend and get some good rest while we could. I was pretty bummed. I'm used to cozy family Thanksgivings, and I was worried how I would feel about Thanksgiving without my family. It is my first big holiday without them.
Although I did miss my family very much today at dinner (and yes, I even missed my dad's stories that he tells over and over and over again), it was nice to have a quiet dinner with Jason that we cooked together, and it felt especially nice to start new traditions and try new things.


Really, the newest thing about Thanksgiving this year was that we made tofurkey.
It's tiny and kind of salty, but it was a good alternative.


I also made my own cranberry sauce, only I tried it with less sugar, and it tastes better that way!
Recipe:
1 cup water
1/2 cup sugar (let the two boil together)
3 cups cranberries

Let cranberry skin pop and serve. Easy peasy.


Happy Thanksgiving from my crazy family to yours!

Sunday, November 22, 2009

November House Show, Part II

The last house show of November was so much fun! I wish everyone could have been there to listen to the music and experience the fun!
We made some new friends, played with kids, ate a lot, our brains were blown by great musical performances, AND no one was mean to Willi. Hooray!

Eli August played, and he did a great job!
I especially loved his ukulele songs, however, I am biased when it comes to uking til you're puking. In fact, the topic of puking even came up during his set! (Not in a gross way, of course. It was fitting and humorous.)

Plum Union graced our presence once again. It feels so nice to have a circle of friends all over the country, however, it feels comforting to know that there are some right by you that you can always visit with and smell the garlic and tea tree oil mixture on them when you hug them! Not only that, but to hear their lovely singing voices almost whenever you please!
Edwin of Plum Union just had a birthday on Wednesday, so I baked a cake for him from scratch, and I decorated it with some runny homemade frosting.Cat also played some solo songs, which were a real treat! It was the first time I've seen her perform live by herself.

Cowboy Motif played some pretty upbeat, acoustic pop songs with an Animal Collective backbone, which I am always a sucker for.
They were very young and very sweet and kind.


Let's do this again, and again, and again, please!

Monday, October 12, 2009

Vanilla Apple Tart.

I try my hardest to bake Jason a treat once a week. This usually turns out to be a treat once a month, but whatev's, I work more than 45 hours a week.


Vanilla Apple Tart.

Ingredients:
Dough:
1 cup flour
1/4 cup milk
2 tbl oil

Filling:
1 large Granny Smith Apple
1 1/2 tsp sugar
1 tsp flour
pinch of salt
1/4 tsp brown sugar
1/8 tsp cinnamon
1/8 tsp vanilla (or less, depending on how you like it!)


Directions:
  1. Preheat oven to 400* F.
  2. Mix dough ingredients together. Roll out dough, then place it into your pie dish.
  3. Mix together your filling ingredients, lay them over the dough.
  4. Bake for 13-18 mins.
  5. Remove from oven.
  6. Sprinkle powdered sugar over the tart while it is still warm. (This helped to make it more moist without covering the whole tart in icky sugar jelly filling. yuck.)
  7. Allow to cool, then sprinkle some brown sugar over the apples.
  8. Eat!

Thursday, September 10, 2009

Break it down now!...so I hear you like pita bread?

Okay, a little break from the blessings. Blah blah blah (I hope that's not what you're hearing, even though I know that's probably what you're hearing!)


Pita Bread Recipe!
Ingredients:
  • 3 cups flour
  • 1 package of yeast (or 2 1/2 tsp)
  • 1 tsp salt
  • 1 1/4 cup warm water
  • 1/2 tsp Italian herbs (or just one of your favorite Italian herbs would be fine too, I'm sure.)
  • 1 tsp garlic powder
  • 1/2 tsp sugar (nuh-uh, you say? yes sir/madam, I say!)
  • olive oil
How to do it, and do it well (according to Connie):
  1. Pre-heat oven to 400*F.
  2. Add yeast to 1/4 cup of warm water, wait a few minutes to let it activate.
  3. Mix dry ingredients together.
  4. Make a well in the middle to the dry mixture (basically, dig a little hole). Add 1 additional cup of warm water. Mix together, then knead and let it rise is a warm place for about an hour. (My mom always put her dough to rise on top of the steps with a towel over it.)
  5. Divide the dough into smaller balls (depending on how big you would like your pita bread to be), then roll them out with a rolling pin.
  6. Grease a baking sheet with olive oil, and place the rolled out pita dough upon it. Put a little olive oil on top of the rolled out dough to keep it moist and D-lish.
  7. Bake for 10-12 mins. This really depends on how chewy/crunchy you would like your pita bread to be.
  8. And now the best part! Eat!!

Oh hey, look what you can do with it!
Hello, dinner.yum!

Monday, August 17, 2009

Trailmix Cooks.

This is an extremely simple recipe that is a variation of my Oatmeal Chocolate Chip Cookies that I posted in late spring of this year.
My Trailmix cookie recipe is perfect for late summer when everyone is pushing in their last camping adventures and picnics with friends.
It's a hardy cookie, packed with oats, dried berries, nuts, and chocolate.
What could be better, right?
Peanut butter.
That's the answer.
And that's why I put it in these bad boys.


Trailmix Cookies!
Yum!

Ingredients:
  • 1 cup butter (room temp)
  • 1 cup sugar
  • 1 cup light brown sugar (lightly packed!)
  • 2 cups flour
  • 2 cups quick oats
  • 1 1/2 cup trailmix (I used Country Trailmix. The mostly peanut kind, because it's what I had in the house.)
  • 1/2 cup chocolate chips
  • 2 eggs
  • 1 tsp salt
  • 1 tbl vanilla
  • 1 tbl natural peanut butter
  • 1 tsp cinnamon
  • 1 tsp baking soda
  • 1 tsp baking powder
  • 2 tbls milk (I used soy milk)

Directions:
  1. Preheat oven to 350*F.
  2. Cream butter in mixing bowl. Add the rest of those ingredients and mix them up, baby!
  3. Place the dough in the fridge to chill for about a half hour (or however long you can keep yourself from sneaking nibbles of cookie dough, in my case...)
  4. Take a tablepoon to scoop out the dough, and help to shape it with another tablespoon.
  5. Place the shaped cookie dough on baking sheets.
  6. Bake for 11-13 mins (or more if your cookies are extra large!)
  7. Take those babies out to cool (I always take them out a little early and allow them to keep cooking on the baking sheets for a bit.)
  8. Enjoy!


Also, get ready for the giveaway!
It's coming up this week!!!

Monday, August 10, 2009

Baking, knitting, sewing, eating, and loving as much as possible.

Jason and I go to the movies often. Once or twice a week. Excessive, I know, but we love it.
Today we went to see Julie & Julia, and it left me feeling inspired to
  1. Write more.
  2. Never go a day without wearing the pearls my grandmother gave me for my birthday this past spring.
  3. To maybe throw in the towel on going back to school to be a teacher.

The main reason why I want to go back to school to become a teacher (besides wanting to enrich the lives of kids with my historical knowledge, which is otherwise useless except for maybe "did you know" dinner discussion) is for the security it would bring to my future family.

I felt as though this would do for a while, but I don't want to be a teacher for the rest of my life! The only thing I ever finding myself wanting to do is bake.
Baking, knitting, sewing, eating, and loving as much as possible.

I am a nanny right now.
That's my occupation. I'm a nanny with two bachelors degrees that I cannot use.
I'm taking this year off of school to pay off my loans as much as possible so I can go back to school to become more in debt.
So now I'm left asking myself three crucial questions:
  1. Why shouldn't I own a bakery like I really want to?
  2. Why shouldn't I do what I love?
  3. Why did I feel undeserving of this, and like I could not own a successful business?

Whatever. I'm good at baking. I love making up my own recipes and I love making people happily chubby. Why shouldn't I do what I love?
So now I'm ending this ranting blog post with my fourth and final question.
4. Why can't cupcakes suffice?


Photo originally posted on newsday.com

Sunday, August 9, 2009

Mini Deep Dish Pizza

I love tiny food.
It's fun to think up, fun to make, and fun to eat.

Passing through Chicago (perhaps a few times too many) inspired this one.

Meet my newest tiny recipe: Mini Deep Dish Pizza!
Shut your mouth, you say? Oh no, I will not!


Pizza Dough Recipe my great grandmother would probably kill me for:
  1. 3 cups flour
  2. 2 1/2 table spoons yeast (or 1 package)
  3. 1 tsp salt
  4. 1 tsp garlic powder
  5. 1/2 crushed red pepper
  6. 1/2 chilli powder
  7. 1/4 cup warm water, to put the yeast into
  8. an additional 1 cup of water to add to the dry mixture
Directions:
  1. Add yeast to 1/4 cup warm water, allow to sit for 5 mins.
  2. While you're waiting on the yeast, mix the dry ingredients together.
  3. Make well in dry ingredients and add the 1/4 cup water with yeast added, then an additional cup of water.
  4. Knead, then let sit for at least an hour in a warm place. I always put a towel over my rising dough for added moisture.
  5. Knead again, and you're ready to rumble.


Mini Deep Dish Pizza Recipe (with pictures):
  1. Preheat oven to 400*F,
  2. Grease a large muffin tin with olive oil.
  3. Divide dough and roll out each section individually for each tiny pizza. Place each tiny pizza crust into where a muffin or cupcake would usually go within the tin.
  4. Pour your sauce of choice into each mini pizza. (Jason usually chooses pesto or alfredo sauce for pizza sauce, so he made some as his contribution to the meal!) I put about a serving spoons amount in each mini pizza.
  5. Chop up your veggies (onions, mushrooms, and spinach! YUM!!)
  6. Add healthy portions in for the toppings to fill those bad boys right up. I chose to put my veggies in first to get as much healthy food in as possible.
  7. Sprinkle cheese on top of your pizza (Again, untraditional, but I'm pushing the veggies first here!!!) I used mozzarella and feta.
  8. Bake for 15-20 mins.
  9. Remove from oven.
  10. Enjoy!
Blog Widget by LinkWithin