Showing posts with label tips. Show all posts

Thursday, February 9, 2012

TRY the DIY.

Here's a collections of some great DIY projects that I'm itching to try!  I knew you would all be pretty interested too, so I thought I would share.

1.)  I've been seeing these knitted pouf stools everywhere lately.  And they are always extremely expensive.So if you're like me, and you're asking yourself "how the heck can I get this look for less?":  look no further!
Click here for a knitted floor pouf tutorial from Norwegian Knitting Website, Pickles!
Wouldn't this pattern work great with a stretched jersey fabric instead of yarn?

2.)  DIY sprinkles!  I know, right?  Can we just talk about how many times I have gone to the grocery store to buy just plain white sprinkles and all I can find is a rainbow funfetti vomit fest?  Now I never have to worry about it again.  This tutorial makes so much sense, and I am POed that I never thought of it before.
Click here to learn how to make your own sprinkles!

3.)  Spumoni Bombe!  Think Neapolitan ice cream and Baked Alaska had a chunky Italian baby.
Click here for a step by step Spumoni Bombe recipe!

Tuesday, October 18, 2011

Fabric Bookshelf Tutorial

Remember when I posted about giving Jason's vinyl bookshelf a much needed makeover?
Well, I finally did it.
And it was an easy fix.  The best part was that you can change the fabric with ease to make it fit with any room decor!  Love it.


Materials:
  • Cotton Fabric 
  • Measuring Tape
  • Scissors/Rotary Cutter
  • Self-healing Rotary Board
  • Pen and Paper
  • Double-sided tape


Instructions:
  1. Measure the length and width of the backboard of each separate shelf.  If you have 5 shelves, you need to measure 5 backboard sections, unless they're all the same.  Double check, just in case.
  2. Jot down the measurements with your pen and paper so you won't forget!
  3. Once your fabric is ironed, lay it upon the rotary board and cut accordingly to your measurements.  You might want to give 1/8th inch of excess fabric, just in case your fabric is kind of stretchy.  You can always go back and cut the fabric more if you need to.
  4. Apply double-sided tape to the corners and middle boarder of each backboard section of the bookshelf.
  5. Stick your cut fabric onto the backboard.  Feel free to readjust as necessary.
  6. Fin!

Monday, September 13, 2010

No Shampoo...1 Month.

About a month ago I started the No Poo process, when I stopped using shampoo and used baking soda and apple cider vinegar to wash my hair instead.  My hair was in a greasy, in-between state for almost 3 weeks, which as an educator and role model...is just not okay in my book.
Finally after:
  • getting so frustrated with that fact that I could not run my fingers through my hair even an inch without my fingers getting stuck in a disgusting greasy knot.  
  • Getting a really dry scalp.
I gave up.


I made my way over to the Willy Street Co-op (a few blocks from my home in Madison.) to look for a natural shampoo that would work for me.  I didn't care how expensive it was (within reason), as long as it:
  1. Was not harmful to the environment.
  2. Allowed me to run my fingers through my hair again.  (to think, I used to take this for granted!
Since then I've been using Vanilla Mint: Everyday Shea Moisturizing Shampoo which has been like a dream come true.  It's not insanely expensive at the Co-op, and lasts forever; although I don't use it everyday like it suggests (the one good thing that I got out of the no-poo process)

I am not dissing the No Poo movement at all, nor will I ever.  It just didn't work for me, which I'm sad about, but it did bring me to a natural shampoo that I love (and my hair does too!)
Win!


Monday, September 6, 2010

How to be alone.


My sister posted this on her blog earlier this week.  Please do yourself a favor and:
  1. Watch the video (it's so true and comforting.)
  2. Visit my sister's blog, Through Cat Eyed Frames.  (Perhaps this will encourage her to write more!)

Saturday, September 4, 2010

accentuate your waist tutorial

This top tutorial is easy peasy lemon squeezey.  I completed it in about 5 mins or less, and it looks so much better!


Accentuate Your Waist Tutorial
 You could do this with a shirt OR a dress, either way it's going to show off the lovely waist that you already have (it's just hiding under your bosom's...I promise.)  Basically all you're going to do is make a series of helpful darts!

Supplies:
  • a shirt/dress that you would like to fix
  • thread
  • a sewing machine, or a sewing needle
  • pins (optional)
  • scissors
Directions
  1. Turn your top inside out.  Take note of where your natural waistline is, and place some pins there so you will know where to dart.
  2. Take off the shirt, and begin to make tiny folds in the fabric.  Sew a seam over each fold to keep it in place.  These are your darts. 
  3. Make several more darts (folds and seams over the folds.)  I made 7, but please feel free to do whatever feels/looks right to you!  Also note that I made my darts under my chest, however, you can also do it on the back of the shirt as well.  I prefer the darts on the front of the shirt because it's forgiving and more comfortable in the tummy area.


Before:


After:

Sunday, August 22, 2010

Skinny Eggplant Parmesan

Okay.  Enough with the hair for a day. 


Skinny Eggplant Parmesan.
I love making this recipe.  Eggplant was my family's ultimate comfort food when I was a girl.  It sang our heritage, our ups and downs.  It was always the center of the first meal my mother always prepared for me when I came home from college or from touring that let me know that I was actually home.  My mom still makes it the first night I come home to Pennsylvania whenever I visit.
Now.  Usually Eggplant Parmesan is a pretty fattening dish, but it doesn't have to be.  What makes my Eggplant Parmesan different from the rest is that I do not fry my breaded eggplant.  I bake it.
I also use fresh mozzarella, and not the packaged kind that is full of extra sodium.
It ends up:
  1. Tasting better.
  2. Leaving you with a full belly that isn't full of heavy oil.

Ingredients:
  • 1 Medium-Large Eggplant
  • breadcrumbs
  • 2 eggs
  • 2 Tbl. Milk, or any milk substitute would do just fine
  • Fresh mozzarella 
  • Fresh marinara sauce (handmade or local is always better tasting, and better for you...no weird ingredients.)
  • Olive Oil
Supplies:
  • 2 baking sheets
  • Frying pan, or whatever you really have that will heat it up

Directions:
  1. Pre-heat the oven to 350*F.
  2. Peel the Eggplant (you can leave the skin on, but it is bitter, tough, and has a noticeably different texture that I don't like.) then slice it into about 1/4 inch coins.
  3. Beat Eggs and about 2 tbl. milk together.  Dip the eggplant coins into the Eggs/milk, and then cover them in breadcrumbs.
  4. Lightly brush the baking sheet with olive oil, and proceed to lay the eggplant onto the sheets.
  5. Bake for 10 minutues, turn the eggplant coins over and proceed to bake for another 10 mins, and remove the baking sheet once the eggplant is soft (or until a fork will slip out of the eggplant easily.)
  6. Heat the frying pan, and add 1/2 cup marinara sauce to the bottom of the pan.  Proceed to lay the eggplant in the frying pan one at a time.  Follow the pattern:  Eggplant, marinara sauce, mozzarella.  Repeat.
  7. Cook until everything is warm, melty, and delicious.
 

Saturday, August 21, 2010

Natural Woman, Day 3 and 4

Day 3:
I didn't use any Apple Cider Vinegar today, and my hair is still pretty gnarly.  My scalp feels okay, but my longer hair feels so heavy.  It just kind of seems to dry in chunks after I brush it.   Tomorrow I am certainly using more than just 1 tsp. baking soda.  Ick.


Day 4:
Today I used three tsps. of baking soda and about four teaspoons of water to make a watery paste.  I put it in a small squeeze bottle and applied it to dry hair instead of wet hair (like I had been doing previously) and put it all over my hair to clean all of the dirt that had accumulated the past few days.  My goal is to get back down to 1 tsp of baking soda once my hair has transitioned, but I think I'm just going to have to slowly decrease the amount of baking soda I use so I don't have to feel gross in the meantime.
I also used the Apple Cider Vinegar again today, with 1/2 tsp of vanilla extract added to it.  I thought it might leave me hair with some sort of sweet smell, but it didn't.  I'm thinking of adding some lavender oil once my hair has finally adjusted.

Oh!  Also!  My hair feels so much softer today that it EVER did when I used shampoo.  
Yeah, you know.

Thursday, August 19, 2010

Natural Woman, Day 2

Day 2

I'm not going to lie...My hair is feeling pretty gross today.
I never used conditioner before I started the No-Poo process, and I'm thinking that maybe I should not use Apple Cider Vinegar either until my hair adjusts (since that's what is used as the conditioner for your hair.)  I also feel like a french fry at some icky gyro place in Seaside Heights when I'm washing my hair, even though the scent of Apple Cider Vinegar washes out completely.  It doesn't linger.  It's just the 30 seconds that I leave it in.  (Don't worry, my future Poo-Free pal's.)

You can also use olive oil if you feel like your hair is left feeling a bit dry...but let's face it.   I really don't need that right now, considering I look/feel like a Trustafarian today. 

Warning:  I also might feel kind of gross because 
I am writing this after working 10 hours.
Actually...
I'm fairly certain that has A LOT to do with why I'm feeling pretty "eh."
I think I can, I think I can...

Wednesday, August 18, 2010

Natural Woman, Day 1

I am on a quest.
A quest to become a natural woman.
Yeah, like the Carol King kind.

How am I going to start such a journey, you ask?
I'm going to stop buying/using shampoo.


WHAT?!?
"That is gross and dirty", you say? Well, actually it's pretty old school.
I'm taking a cue from my ancestors and washing my hair with baking soda, apple cider vinegar, and warm water.
Click here to find the recipe I'm using.


I've been researching the No Poo Movement for a few weeks, and supposedly shampoo poisons your body, your hair, and the environment. Count me out.
So now I'm documenting my DIY journey to healthy hair, one less squirt of shampoo at a time.


Day 1:
My personal hair routine before:
I don't dye it, blow dry it, use conditioner, and sometimes I don't even brush it. (whoops..)
So it's pretty healthy, I guess.

Before.


After:
Still not dyeing, blow drying, or anything stupid. You know.


Note-worthy Notes:
So far my hair certainly feels like it's adjusting/transitioning,
but it doesn't feel or look greasy.
So far so good.

The weirdest thing so far is taking pictures of myself to document it. It's like hearing your own voice. Ew.

Tuesday, August 10, 2010

DIY Coaster Tutorial

I love pretty paper, especially wrapping paper. That's why I always save the ones I really love.
This DIY Coaster Tutorial is a great way to use that beautiful paper that you can't bare to part with!
And it's simple!
(I made these coasters while I was talking to my sister on the phone about how her creepy landlord keeps asking her out on dates. Eeek!!)


DIY Coaster Tutorial

Materials:
  • Mod Podge
  • Paint brush
  • Old coasters or tiles.
  • Scissors
  • Paper (scrapbooking paper, wrapping paper, a picture from a book, etc.. just don't use a picture you've printed out...the colors will run.)
  • Pencil
Directions:
  1. Trace the shape of the tile onto your desired paper with a pencil, then cut.
  2. Lightly coat the tile with Mod Podge, place the paper onto the tile, and press out all of the bubbles.
  3. Paint another coat of Mod Podge on top of the picture. Let dry for 20 mins.
  4. Apply another coat of Mod Podge. (You can also use Resin for the top layer, but it's a pain in the butt, and it also smells like butt.)
  5. Allow your coaster to dry for 24 hours. (I put mine under a colander so my cats/dust/whatever couldn't get to it.) Please keep in mind that it takes about a month for Mod Podge to completely dry, so don't but anything hot onto your coaster for FOUR WEEKS!


As always, Willie and Humphrey felt that they needed to help me.
(God knows, my cats love their fish.)

Tuesday, July 27, 2010

Ladies Rock Camp Madison


Ladies of Madison, Wisconsin...
Are you ready to rock out?
Sweet, me too.
I love it when we do things.
(Especially when these things 1. empower us and 2. make us better people. Win/Win.)


Ladies Rock Camp Madison is set to begin it's first session ever in October! It's designed just like Girls Rock Camp, except it is for women within the ages of 19-190 and it's condensed into three days. Get ready to learn an instrument, start a band, write a song, record your song, and play your first show!
  • Are you worried that you might not be able to afford it? Check out the financial aid application on the Camp 2010 page.
  • Are you worried that you will have too much fun while I'm teaching Punk Rock Aerobics? Good, because you will.


P.S., I'm playing at the High Noon Saloon on Sunday, October 17th (1PM-3PM) to benefit GRCmadison! Admission is $5, and it goes straight to the camp!
Please come out and support the next generation of music-makers!

Monday, July 26, 2010

Granny2 Rag Rug Tutorial

This isn't your granny's Rag Rug, but it does involve Granny square-like qualities!

Granny2 Rag Rug

Supplies:
  • Scrap jersey fabric. (I used old t-shirts and scrap fabric, even lonely socks!)
  • Chunky crochet hook (Anything that will handle jersey fabric well.)
Directions:
  1. Cut jersey fabric into strips (I cut them into 1" strips, but you can certainly choose what works best for you. If you find something that works better, comment and let me know!)
  2. Crochet in a circle. (I'm a knitter. I don't know too much about crocheting, I'm sorry!) I would leave some space and just connect the progress every so often. You want it lay flat.)
  3. I ended up adding some rows on opposite sides of each other to make an oval, because I was getting bored. (Again, I'm sorry, I'm a knitter.)
  4. Keep going until it's as big as you might like it to be.

Monday, July 12, 2010

Festive Summer Fun


Festive Summer fun...from my computer screen to yours.

Wednesday, June 9, 2010

Thrifted Earrings.


What can I say, I love them.
Sure I've been gifted a few new earrings in the past five years, and I've even made a few of my own in my summer camp counselor days, but I'd say 75% of my earrings have been found in thrift stores...and I wouldn't have it any other way.

Lately I've been noticing that a lot of people shy away from them, or are nervous or suspicious of them. My advice to you is to give them a shot.
They all have the potential to be tasteful, kitschy, or trashy...but it's what you make of them.
Just dust off your bottle of rubbing alcohol and go to town.

These puppies are even handmade, sucka!

Saturday, February 27, 2010

Be Brave and Think.

My heart aches with the tragedy and uncertainty that has been happening on and to our planet.
I try not to touch upon sad or controversial topics in my blog too often because we hear about the bad in the world more than the good , but I know I'm not the only person who has an aching heart because of this.

I'm not a woman who really prays. Not in a traditional way, at least.
I just think a lot, which I think is kind of like praying.
When we think about difficult topics, we are more likely to take positive action to change or help with the situation. Thinking is a very brave thing to do, when sometimes it's so easy to push socially challenging thoughts out of our minds. Or maybe we get kind of sick of topics after a while because we hear about them so much, but the fact is that maybe you don't want to hear about the tragedy in the world anymore, but you have to think about the people who have to face that tragedy everyday as their reality.

Anyway, I just want everyone to think today. Think about something that is hard to think about, and counter act it with a positive action this weekend.
Do something kind.
Open the door for each person walking behind you.
Make dinner for someone you know who is struggling financially.
Do something little for someone to remind them that they're special.
Donate to a charity.
Send water and food to help relief efforts.

I know you'll think of something.


Okay great. I feel inspired now, I hope you all do too!

Tuesday, August 4, 2009

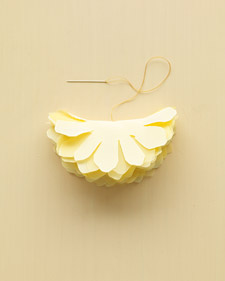
Fabric Rose and Peony Hairpieces How-to.

Peonies are my favorite type of flower.
You can only imagine how excited I was when I found this.
Guess what I'm planning on doing this week?


Love it?
You better believe it.

Thursday, July 30, 2009

Potato Peeling

How to quickly peel a potato!


Fun!
Blog Widget by LinkWithin